
Back in 2003-2005, I was an avid anime fan (if you read my previous stories, you probably know that by now). There was this website called AnimePaper, with a vivid fan community centred around creating very good looking anime-themed wallpapers. There was certain gamification to it too, with a points system, weekly contests and a wallpaper leaderboard.
I was pretty experienced with Photoshop and Illustrator back then, with a few years of experience already. It was thanks to my mother, the vice editor of a local newspaper, I had access to licensed Adobe products since 1999. I learned HTML in Adobe PageMill and DTP in Adobe InDesign.
So sometime in 2005, I really wanted to create a wallpaper that would land the top of that leaderboard. As I’ve been a frequent visitor of AnimePaper, I got the hang of what becomes popular. While the artistic aspect of the wallpaper was important, and there was plenty of great artists on the platform, the idea for the wallpaper was equally important, a certain wow factor.
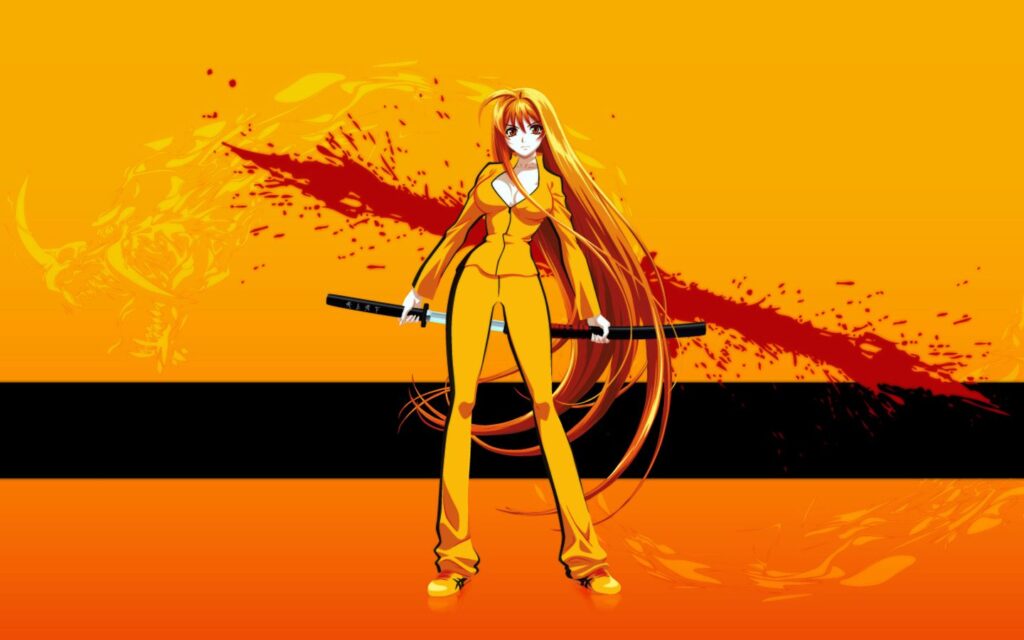
I was a big fan of Tenjgu Tenge anime back then. It was a story of high schoolers who fight, do martial arts and swing big swords. At the same time Kill Bill was still a big thing. So I had this idea to take a girl character from Tenju Tenge and redress her into Uma Thurman’s iconic yellow suit from Kill Bill. Using vector paths. In Illustrator.
I knew it was possible, I saw what other people did with vectors on AnimePaper and it was amazing. But it was also very time consuming and tedious. But I had my goal, right?
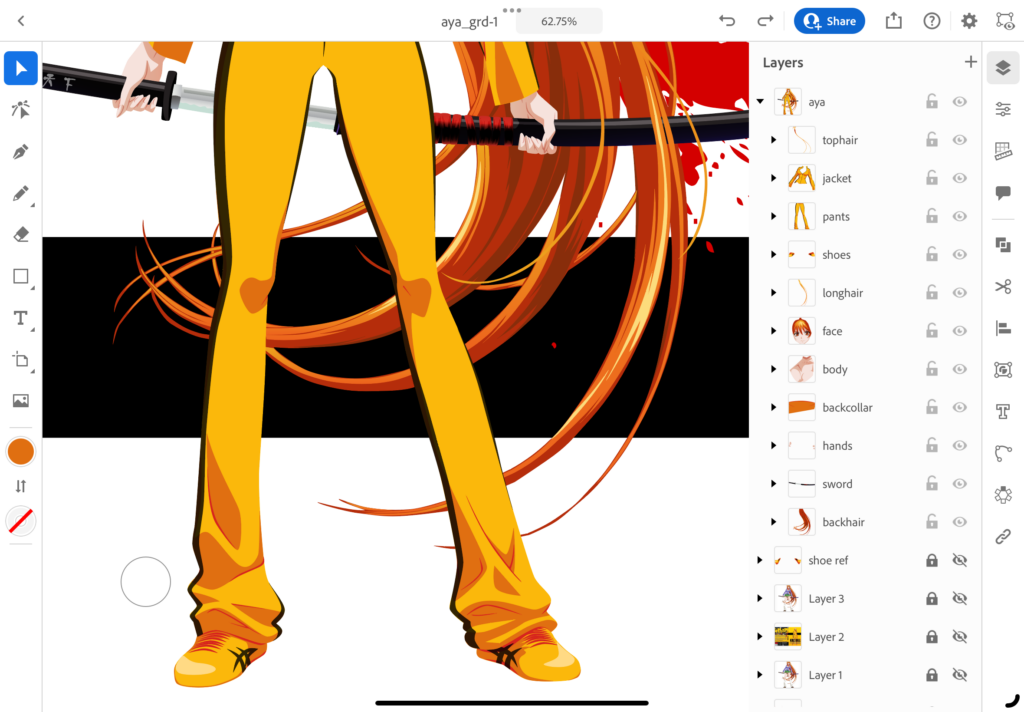
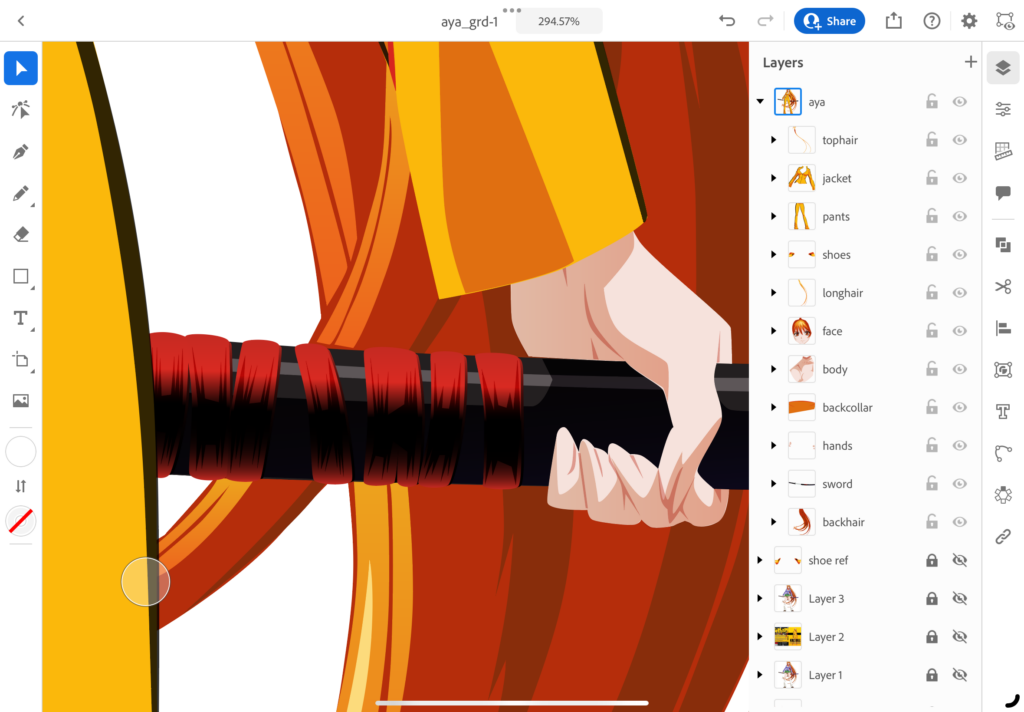
So I started by drawing the first layer of vectors. The body, the face, the hair. Then I moved to the clothes. I didn’t trace the original Uma Thurman’s film photos. Instead, I had it displayed on the side and drew the paths on the rasterised anime character directly, trying to recreate the clothes to maximum.
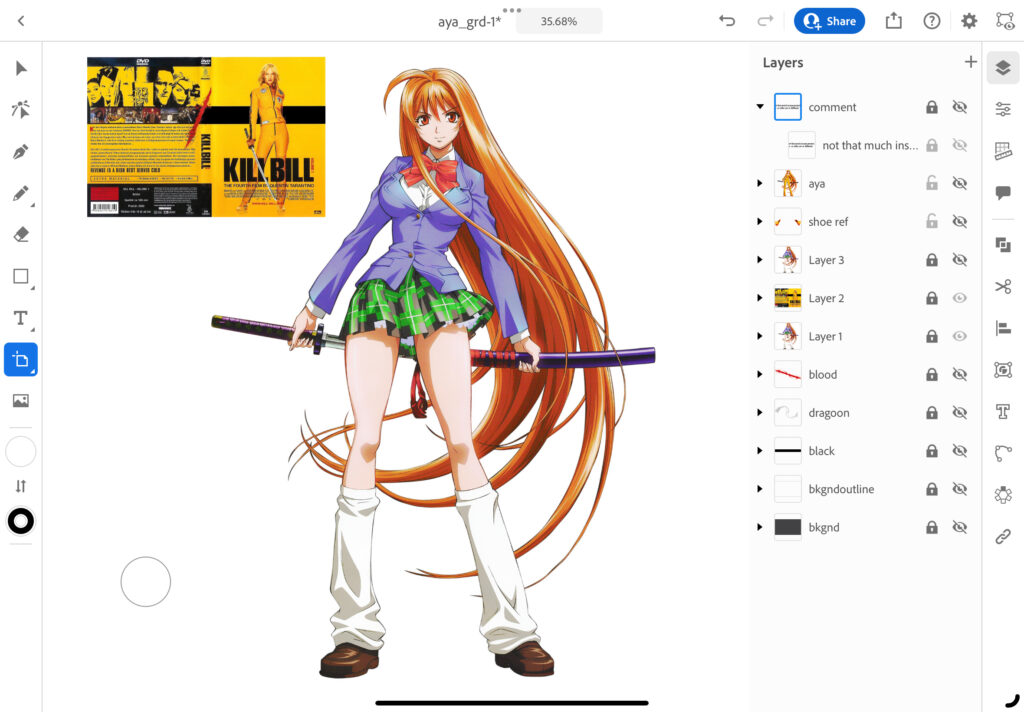
The first layers were all flat, each vector (enclosed path) had a single, flat colour fill and no stroke. The idea was to avoid meshes or gradients, as I didn’t like that style, and have each vector be like a hard brush stroke. Except it was all done using a mouse.
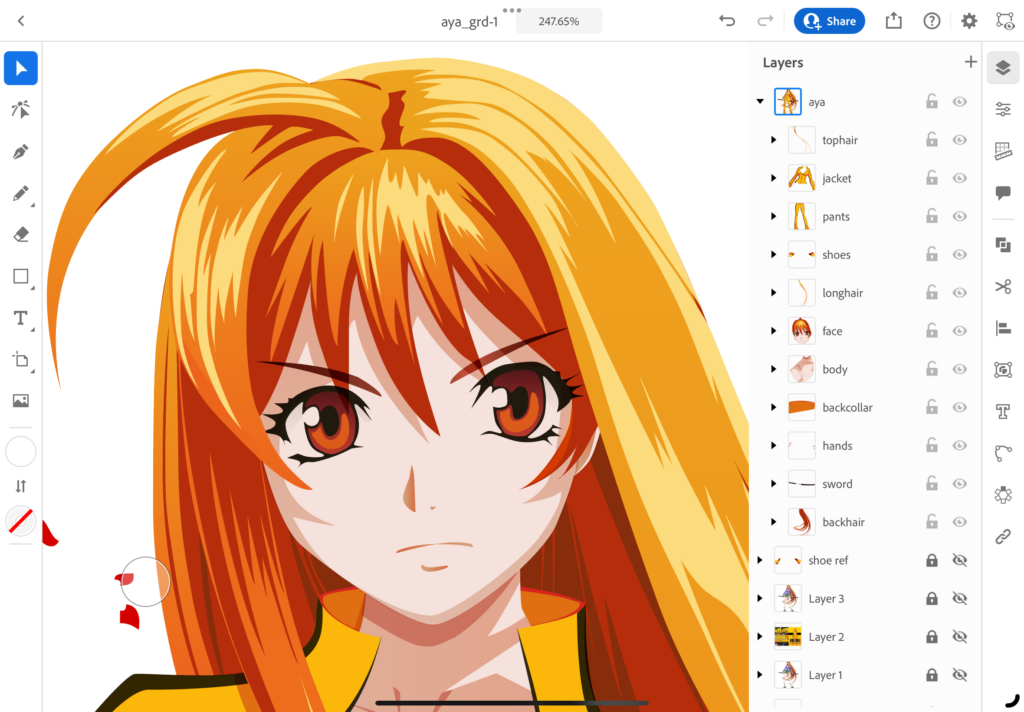
So after I finished the first flat vector layers, I proceeded to create the second layer of vectors that would have a slightly different colour from the one they cover (either lighter or darker) to achieve more depth. Especially on her hair.
Finally, the last layers of vectors were semi-transparent slightly gradient paths that would give the details the necessary boost.
After final touches, spats of blood and decorative stripes, the image was nearly ready. My favourite character from Tenjou Tenge was now the iconic bride on a revenge mission.
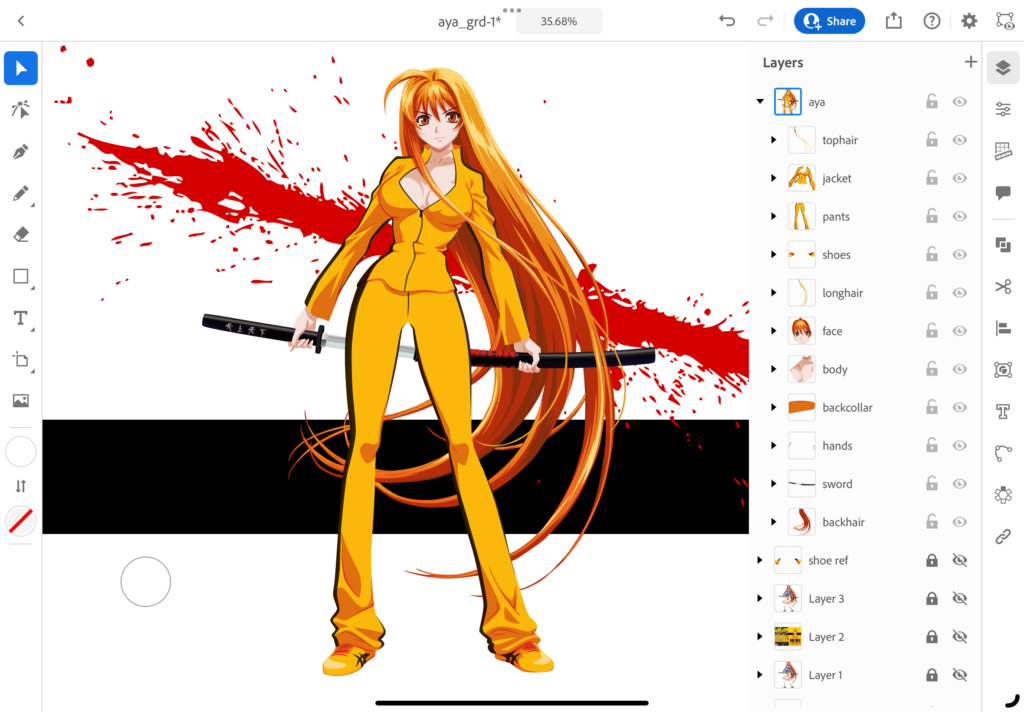
I am not exactly sure how much time it took to do it, but at least 20 hours. I had to make the AnimePaper competition deadline to maximise my chances to top the leaderboard. The competition theme was something like „more than meets the eye” and my work fitted perfectly.
Upon submission, the reactions were as I hoped for, and everybody was pretty impressed. That day, my wallpaper topped the AnimePaper leaderboard. I was satisfied.
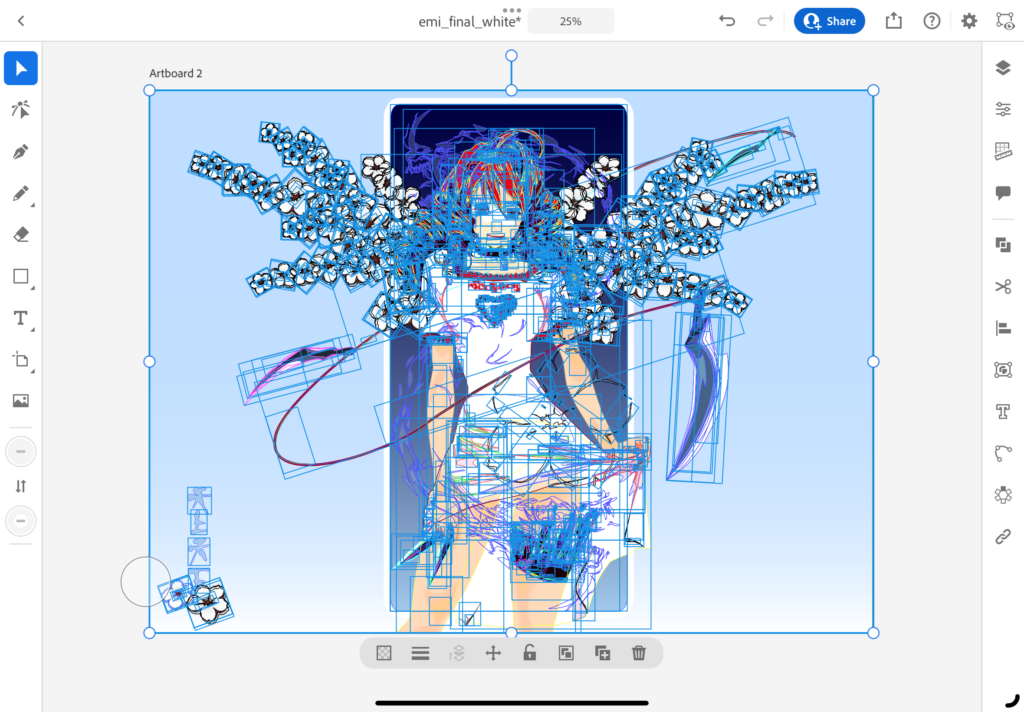
I continued to push the vector style with more detailed images, with even more paths, experimenting with gradients and meshes as well.
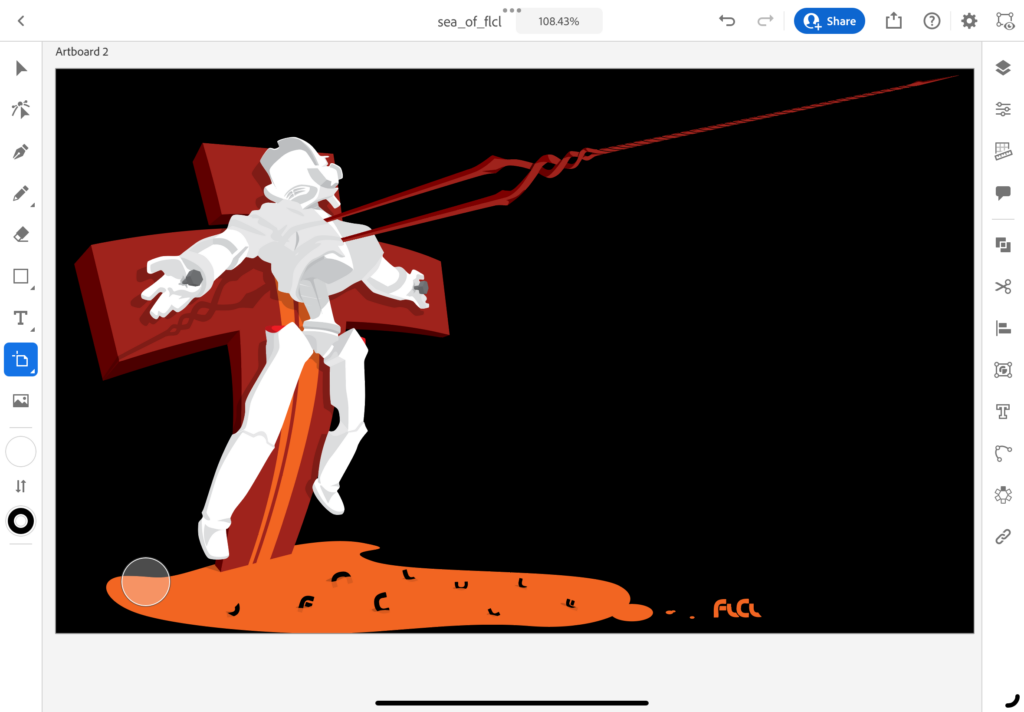
But still, one of my personal favourite works I created is the pun-intended mix of FLCL (Furi Kuri) and Terminal Dogma’s Sea of LCL from the legendary NGE (Neon Genesis Evangelion).
All this hobby experience with Photoshop and Illustrator was invaluable in my professional future. During my undergrad I had a part time job as a graphic designer in an e-learning company. Later I used my design skills in my startups, side projects and professional career. Combined with my ability to code and manage servers, I was able to single-handedly create projects from the idea, concept, wireframe, to design, development, deployment and marketing.